Creating accessible digital documents ensures that everyone—including individuals who rely on screen readers or other assistive technologies—can navigate and consume digital content effectively. This guide outlines how to use Adobe Acrobat Pro alongside auditing tools like Siteimprove to identify, prioritize, and remediate accessibility issues in existing PDF files.
Getting Started
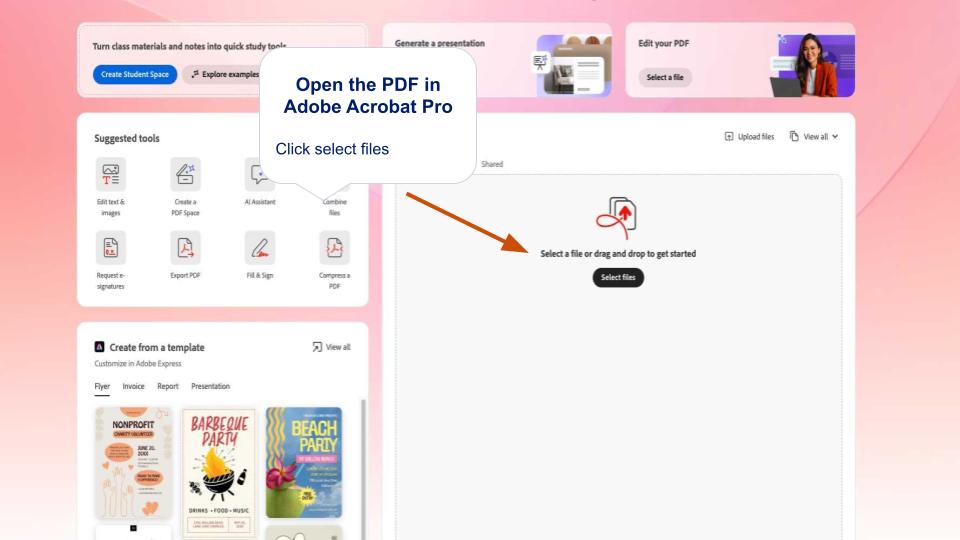
Open the Adobe Acrobat Pro desktop application and log into your account.
Select Open File (or Select Files) to load the PDF you need to remediate.
The Accessibility Checker Tool
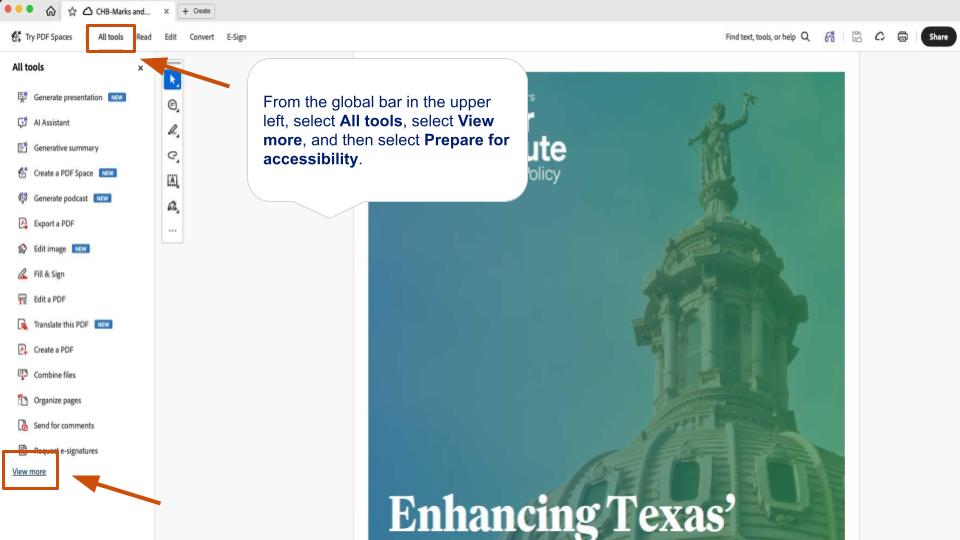
From the global bar in the upper left, select All tools, select View more, and then select Prepare for accessibility.
💡 If you see "Tools" instead of "All tools", make sure you are signed into the desktop version of Adobe Acrobat Pro rather than the web app.
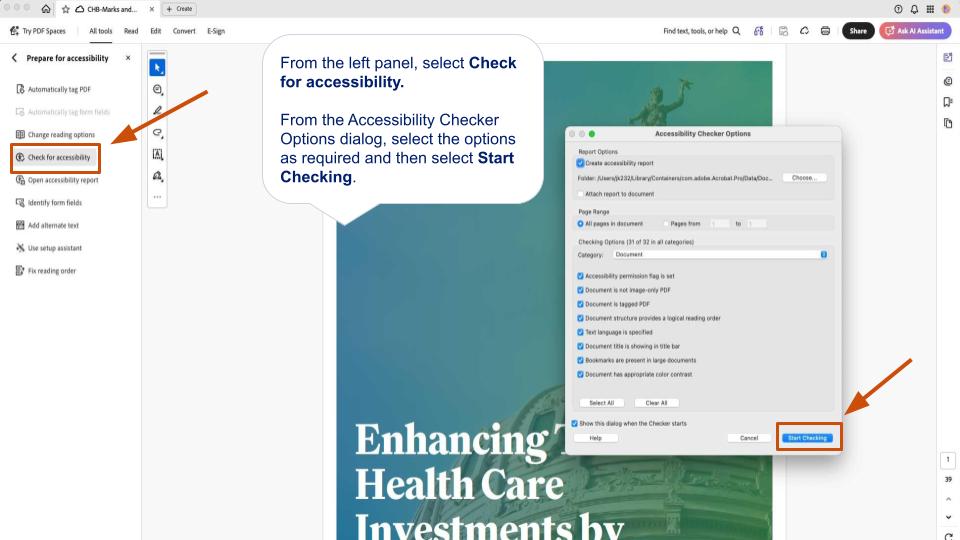
From the left panel, select Check for accessibility.
From the Accessibility Checker Options dialog, select the options as required and then select Start Checking.
Viewing a List of Issues in the Accessibility Checker
Once the scan finishes, a list of accessibility findings will appear in the right-hand panel.
According to Adobe’s documentation:
Since the Accessibility Check feature does not distinguish between essential and nonessential content types, some reported issues may not affect readability. We suggest that you review all issues to determine the ones that need correction.
At Rice, use the Siteimprove dashboard for your specific domain to prioritize readability issues and guide your remediation efforts effectively.
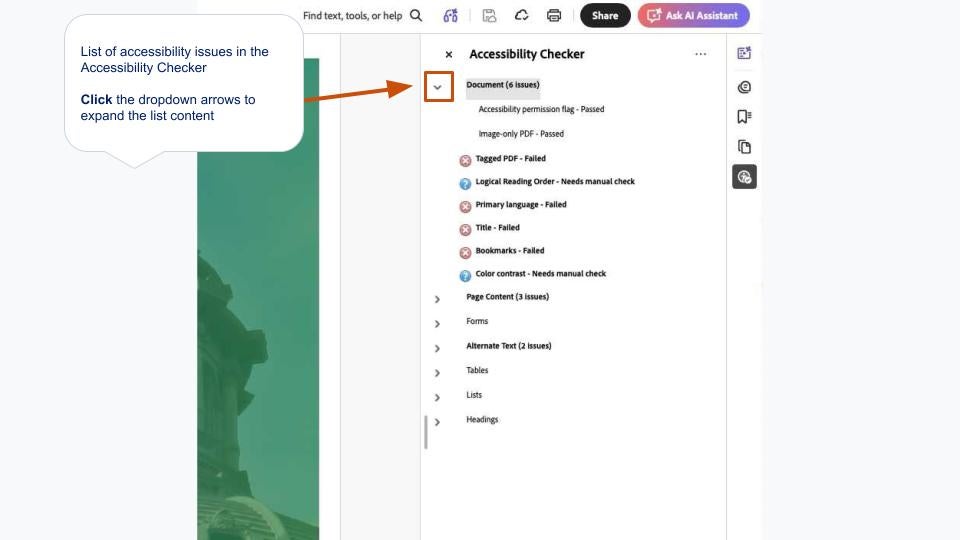
Overview: Fixing Issues Flagged in the Accessibility Checker
This section provides a general overview of how to remediate issues flagged by the Accessibility Checker. For step-by-step instructions on specific errors, refer to the Common Issues section below.
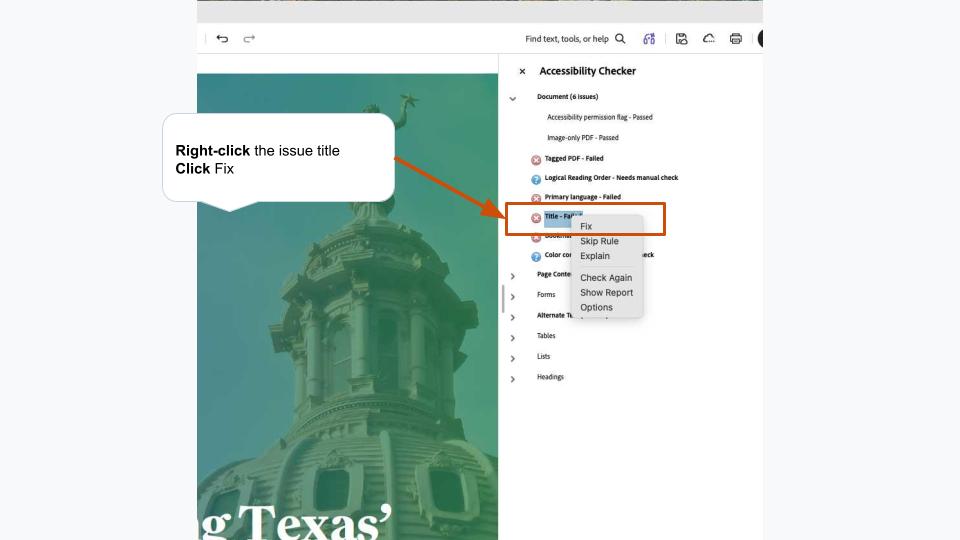
Method 1: Using the Right-Click "Fix" Feature
For many automated checks, Adobe Acrobat can attempt an automatic repair:
- In the Accessibility Checker panel, expand the category to reveal the failed item.
- Right-click (or Control-click on macOS) the issue name and select Fix.
- Follow the prompt (e.g., entering text or choosing an option from a drop-down menu) to complete the fix.
Examples of issues with an automatic right-click "Fix" option:
- Title - Failed (opens the Description dialog box)
- Primary language - Failed (opens the Reading Language selection dialog box)
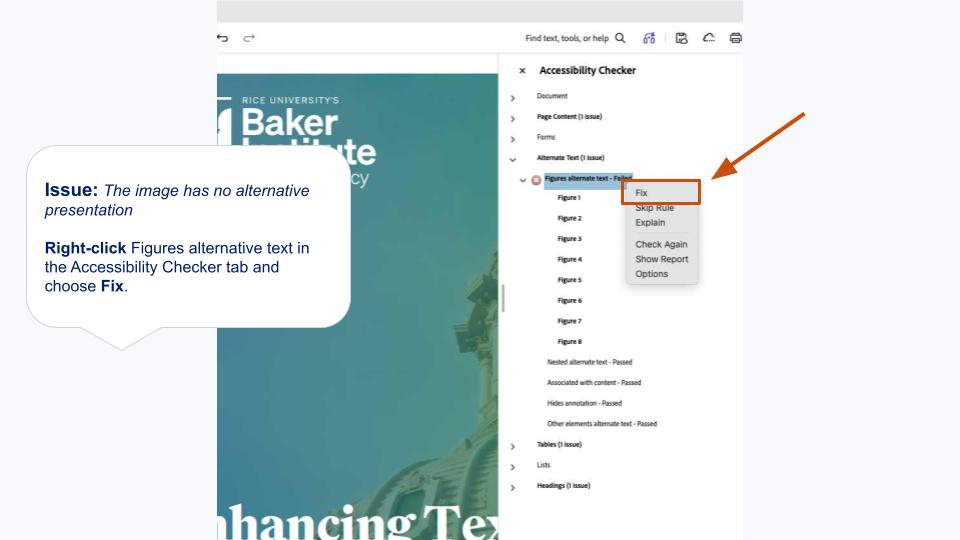
- Figures alternate text - Failed (opens the Set Alternate Text wizard)
- Bookmarks - Failed (opens the Structure Elements selection dialog box)
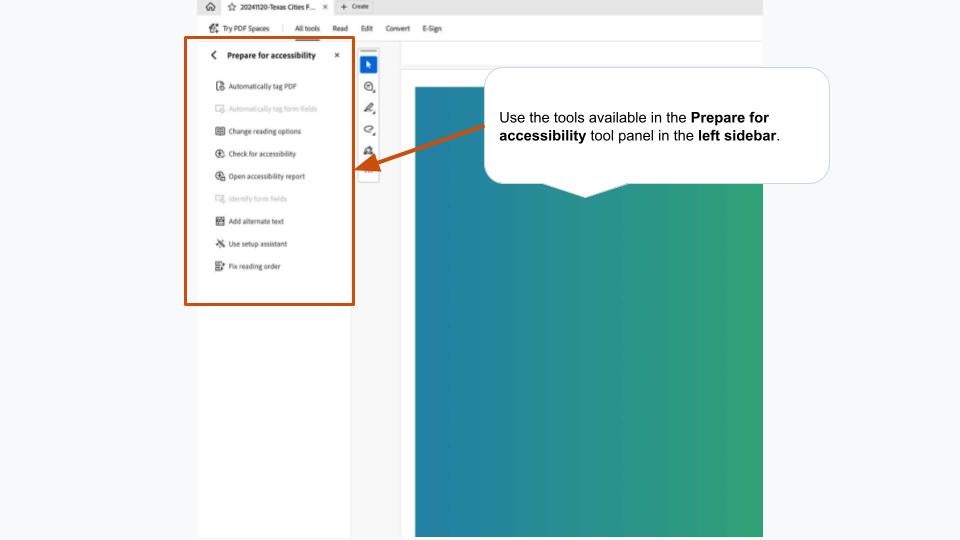
Method 2: Using the Prepare for Accessibility Panel
If right-clicking an issue does not display a Fix option (or if selecting Fix indicates the item must be handled manually), use the tools available in the Prepare for accessibility tool panel in the left sidebar.
Examples include:
- Using Set Alternate Text to cycle through images.
- Using Reading Order to fix heading levels, visual reading structures, and table tags.
- Using Autotag Document to build an underlying document structure tree.
A Note on Tagging and Remediation Sequence
Why Tagging Comes First
It is strongly recommended to resolve Tagging issues before attempting to fix content-level errors (such as alternate text or reading order).
Document tags create the structural tree that screen readers use to read content. Until an element (such as an image, table, or form field) is properly tagged in the document tree, accessibility tools—like the Set Alternate Text wizard—will not detect it as a fixable object.
Automatic Tagging vs. Specific Tag Fixes
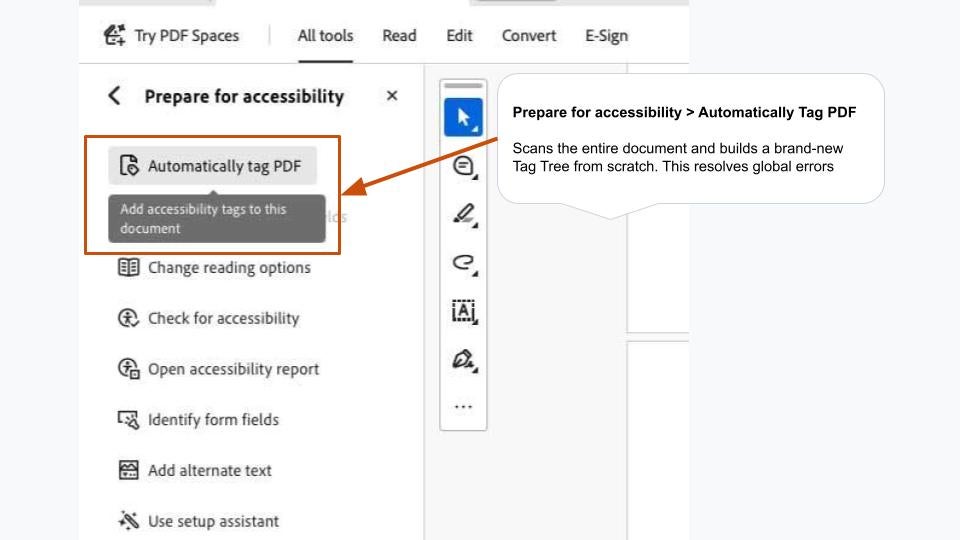
- Automatically Tag PDF (Prepare for accessibility > Autotag Document): Scans the entire document and builds a brand-new Tag Tree from scratch. This resolves global errors like Tagged PDF - Failed and exposes underlying elements (like figures and tables) so they can be remediated.
- Right-Click "Fix" on Tagged PDF - Failed: Triggers Acrobat’s automatic tagging routine specifically for the file container.
⚠️ Important Clarification on Tagging: While Autotag Document is the fastest way to generate a tag tree, automated tagging algorithms rarely achieve 100% accuracy on complex layouts. Always inspect the Tag Tree using the Tags panel (View > Show/Hide > Navigation Panes > Tags) or the Reading Order tool to ensure headings, lists, and reading order match the visual presentation.
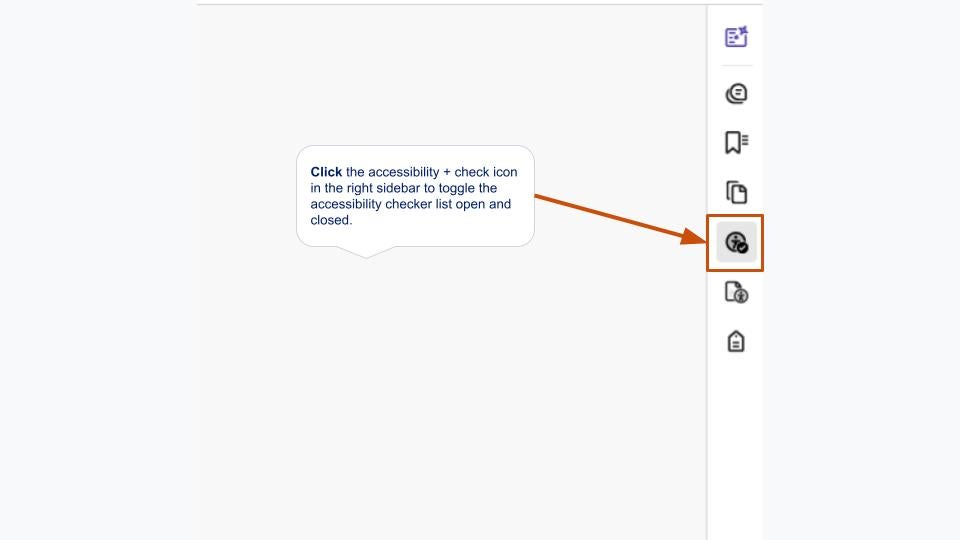
How to Show and Hide the Accessibility Checker List
Click the Accessibility Check icon (the accessibility symbol with a checkmark) in the side navigation panel to show or hide the issues list.
Common Issues
Below are common PDF accessibility issues flagged by Siteimprove and instructions for fixing them using Adobe Acrobat Pro.
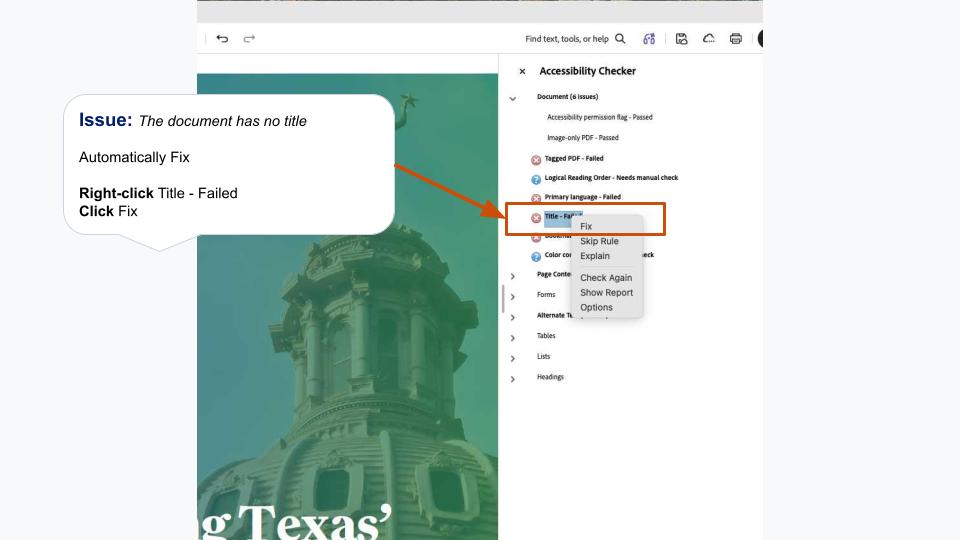
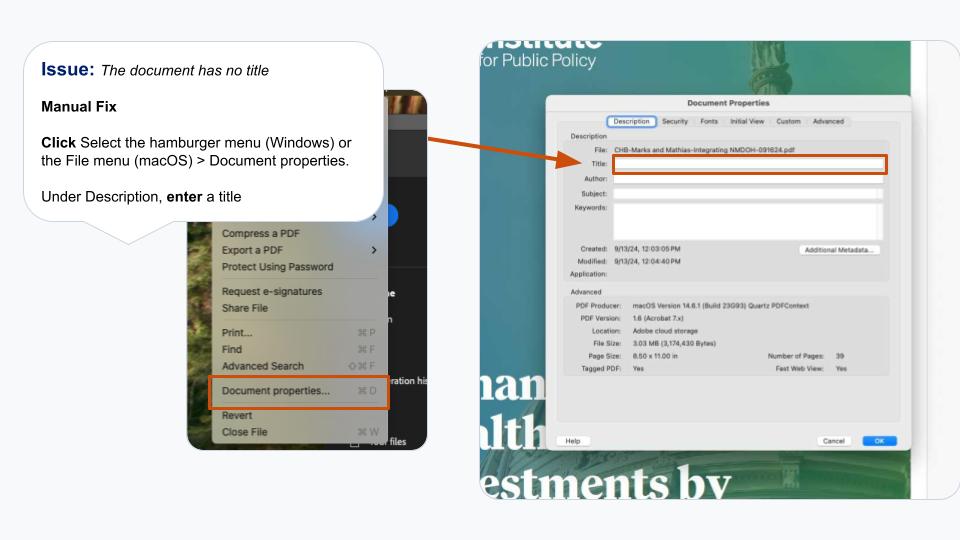
Issue: The Document Has No Title
Automatic Fix:
- In the Accessibility Checker panel, right-click Title - Failed and select Fix.
- Uncheck Leave As Is (if necessary) and enter a clear, descriptive title in the Description box.
- Click OK.
Manual Fix:
- Go to the Hamburger menu (Windows) or File menu (macOS) > Document Properties (or press Ctrl + D / Cmd + D).
- Under the Description tab, enter a descriptive title into the Title field.
- Click the Initial View tab.
- Under Window Options, change the Show drop-down menu from File Name to Document Title.
- Click OK.
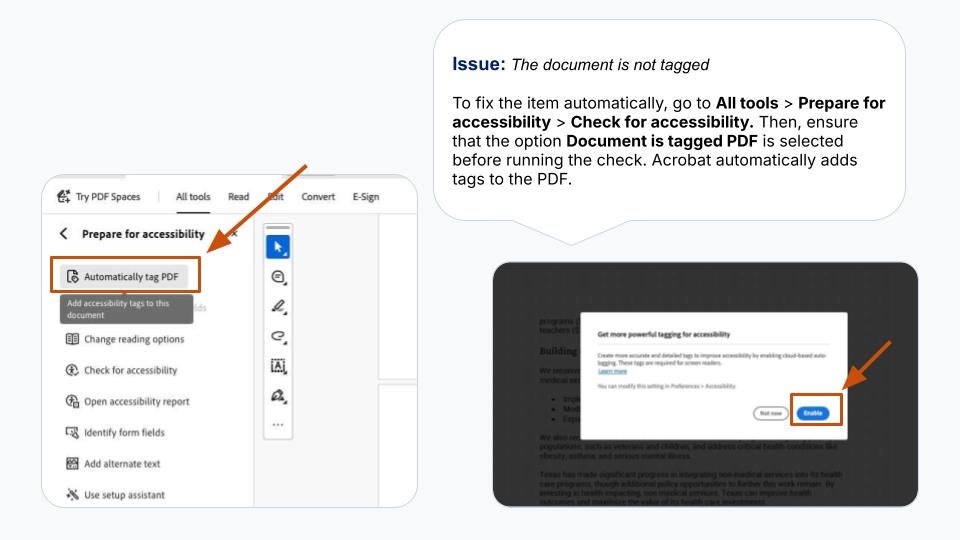
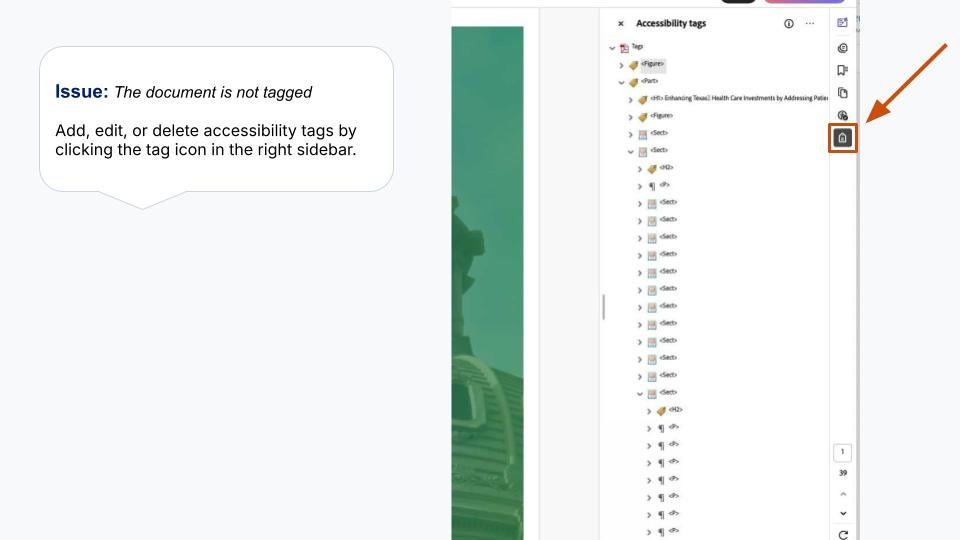
Issue: The Document is Not Tagged
Fix:
- Go to All tools > Prepare for accessibility > Autotag Document.
- Alternatively, re-run the accessibility check and select Autotag document from the options panel to automatically apply document structural tags.
(Source: Adobe - Tagged Content)
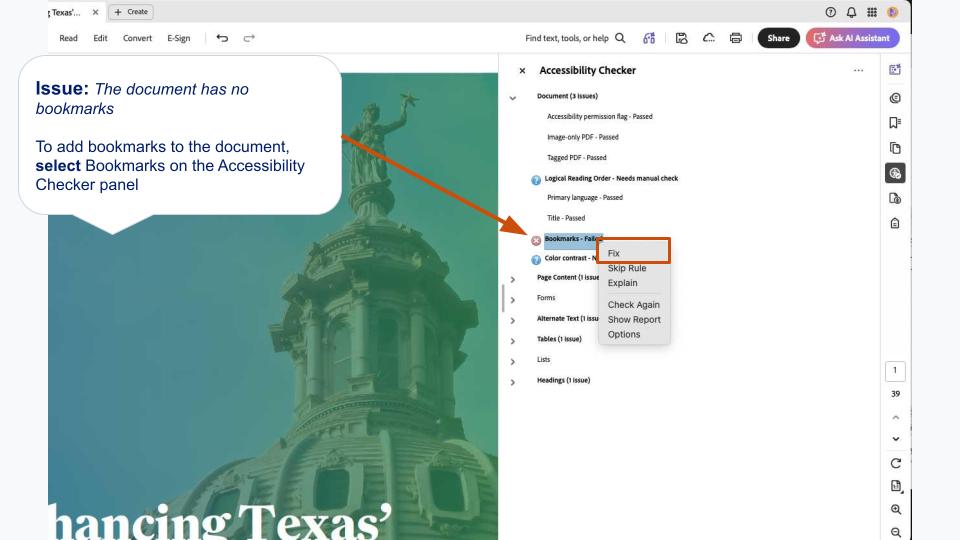
Issue: The Document Has No Bookmarks
This check fails when a document has 21 or more pages but lacks a bookmark structure matching the document headers.
Fix:
- Right-click Bookmarks - Failed in the Accessibility Checker panel and select Fix.
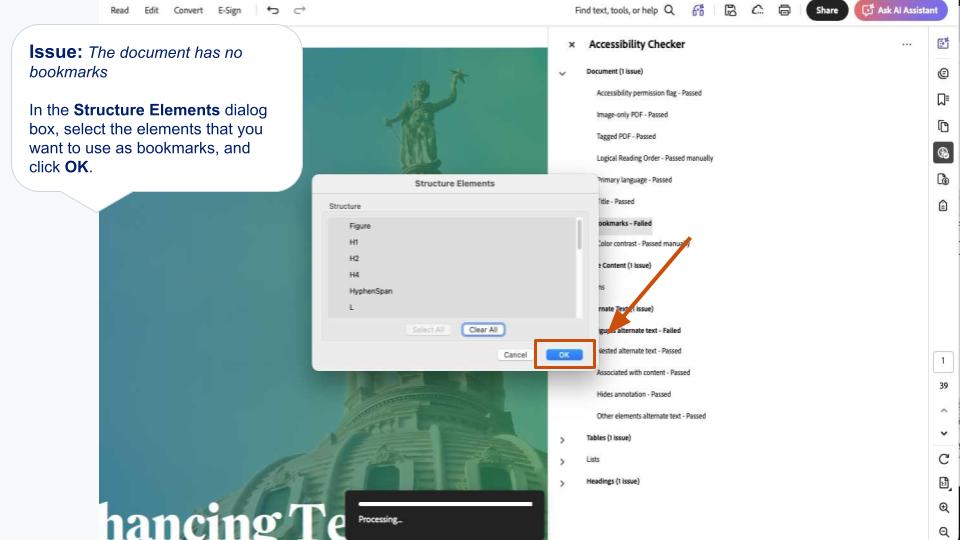
- In the Structure Elements dialog box, choose the heading levels or structural elements you want to use as bookmarks.
- Click OK.
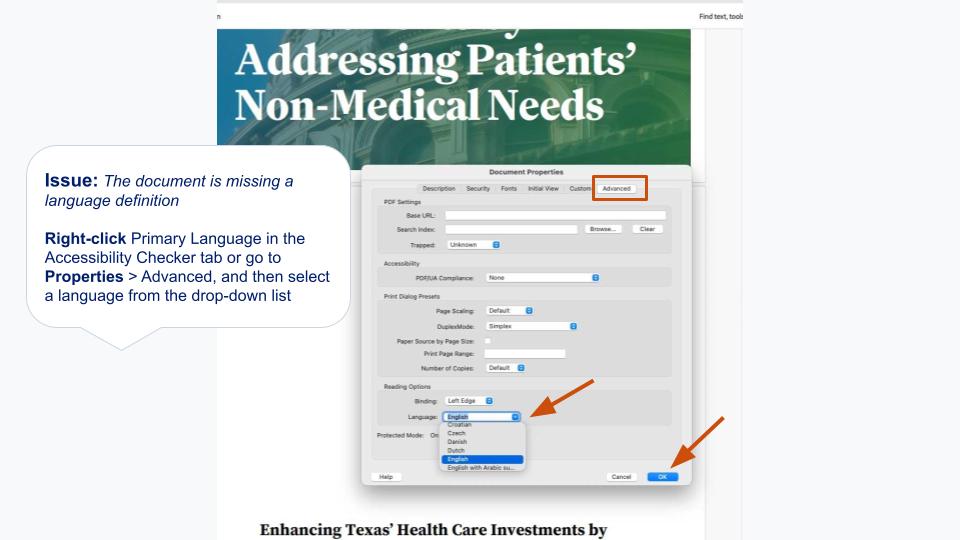
Issue: The Document is Missing a Language Definition
Automatic Fix:
- Right-click Primary Language - Failed in the Accessibility Checker panel and select Fix.
- Select the correct primary language from the Set Reading Language drop-down list.
- Click OK.
Manual Fix:
- Go to the Hamburger menu (Windows) or File menu (macOS) > Document Properties.
- Click the Advanced tab.
- In the Reading Options section, choose the primary language from the Language drop-down menu.
- Click OK.
(Source: Adobe - Document Language)
Issue: The Image Has No Alternative Presentation
Fix:
- In the Accessibility Checker panel, right-click Figures alternate text - Failed and select Fix.
- The Set Alternate Text dialog box will cycle through all images lacking text.
- Type a concise description for meaningful images, or check Decorative Figure if the image provides no informative value.
- Click Save & Close.
(Source: Adobe - Alternate Text)